Storage Unit Cleanout Workflow: Your Step-by-Step Guide
- Joe Lusso
- 1 day ago
- 8 min read


TL;DR:
A proper storage unit cleanout uses a structured workflow involving assessment, sorting, cleaning, and verification to ensure efficiency. Regular maintenance and moisture control are essential to prevent mold and damage over time. Enlisting professional help is advisable for large or infrequent cleanouts to save time and ensure thorough results.
Walking into a packed storage unit can stop you cold. You know something needs to happen, but without a plan, you end up moving boxes from one side to the other and calling it a day. A solid storage unit cleanout workflow changes that completely. Instead of burning a Saturday on chaos, you work through a clear sequence: assess, prepare, execute, verify, and done. Whether you are decluttering after a move, closing out a long-term unit, or helping a business clear storage space, this guide gives you the exact process to get it done right.
Table of Contents
Key takeaways
Point | Details |
Inventory before you start | Taking detailed inventory before the cleanout shapes your timeline, supply list, and decisions. |
Use the Four-Box Method | Sorting items into keep, store, sell/donate, and toss immediately speeds up decision-making. |
Full empty before cleaning | Remove everything first so you can inspect for moisture, pests, and damage thoroughly. |
Moisture control is non-negotiable | Use desiccants and keep items off concrete floors to prevent mold from coming back. |
Regular check-ins prevent problems | Monthly light cleaning and quarterly deep checks keep the unit in good condition long-term. |
Your storage unit cleanout workflow starts with preparation
Most cleanouts fail in the first 20 minutes because people show up without a plan. Detailed inventory helps estimate workload and prepare proper supplies before you ever open the unit door. Skip this step and you will be making three extra trips to the hardware store.
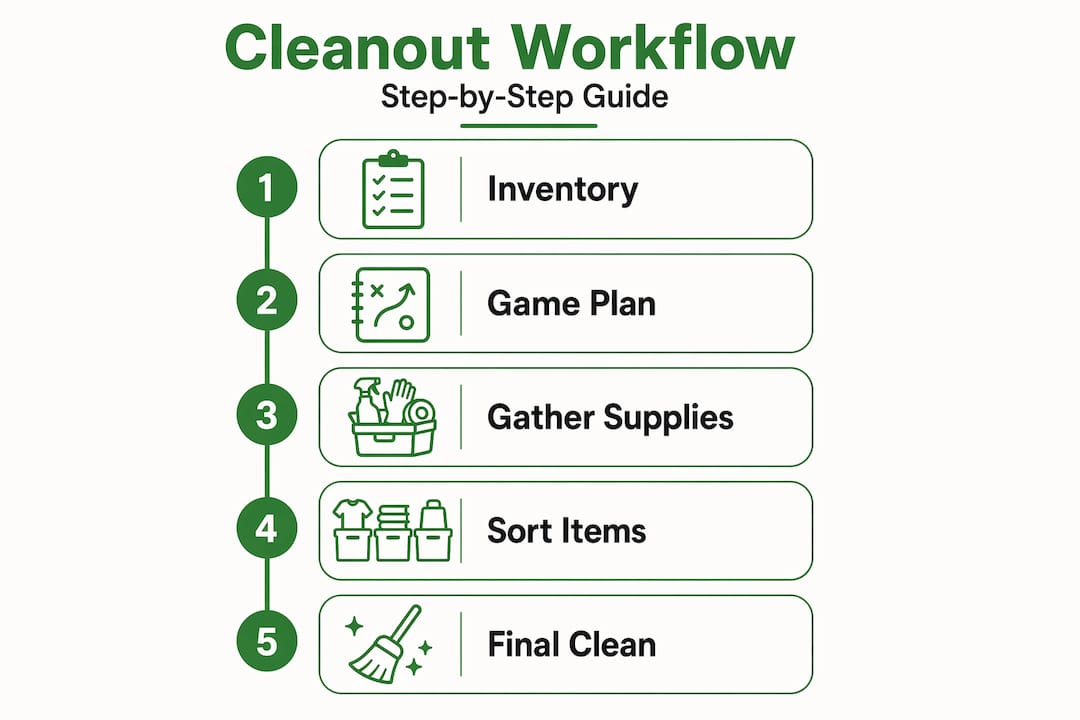
How to take inventory and build a game plan
Start by visiting the unit before your actual cleanout day. Take photos. Make a rough list of what is in there, how many large items you see, and whether anything looks damaged. This reconnaissance trip is what separates a smooth cleanout from a chaotic one.
From that list, figure out how many people you need and how much time to block. A standard 10x10 unit with moderate contents typically takes a four to six hour day for two people. A 10x20 packed floor to ceiling may need a full weekend and an extra set of hands.
Essential supplies table
Supply | Purpose |
Heavy-duty boxes (varied sizes) | Repacking items you plan to keep or move |
Permanent markers and labels | Identifying box contents clearly |
Work gloves | Hand protection from sharp edges, dust, and grime |
Trash bags (heavy gauge) | Bagging items for disposal quickly |
Broom, dustpan, and mop | Sweeping and mopping the unit floor after emptying |
Moisture absorbers (DampRid, silica gel) | Preventing mold after repacking |
Cleaning spray and rags | Wiping down shelving and unit walls |
Dolly or hand truck | Moving heavy items without injury |
Pro Tip: Estimate your supplies by multiplying your box count estimate by 1.5. People consistently underestimate how many boxes a cleanout generates. Running out of bags or boxes mid-job kills momentum fast.
Schedule the cleanout for a dry day if your unit is outdoors or has a roll-up door. Moisture from rain can get into open boxes and create problems you do not want to deal with later.
Step-by-step execution of the cleanout process
Once you are on-site with your supplies and your crew, follow this sequence. Improvising order is how things get missed.
Move everything out of the unit first. Before you sort a single item, pull everything to the front of the unit or into a parking lot or staging area. A complete reset approach means removing all contents before doing any cleaning or decision-making. This lets you see the full scope of what you have.
Sort using the Four-Box Method. Label four areas or large containers: Keep, Store, Sell/Donate, and Toss. The Four-Box Method reduces clutter and clarifies what stays or goes by forcing you to make a decision about every single item. No “maybe” pile. If you cannot decide in 30 seconds, it goes in Donate.
Pack and label your Keep items immediately. Do not let sorted items sit in a loose pile. Box them, label the box on two sides, and move them to a designated area. Visible box labels make future retrieval faster and reduce the chance of you disorganizing things again during move-back.
Sweep, dust, and mop the empty unit. With the unit fully emptied, you now have room to clean properly. Sweep the floor, wipe down any shelving, and mop if needed. This is also your best chance to look for cracks, leaks, and signs of pests.
Inspect for moisture and mold. Check corners, floor edges, and the ceiling. If you spot mold, remove affected items, clean surfaces with a mold-killing product, and dry everything fully before repacking. Report visible wall or ceiling mold to facility management immediately.
Handle disposal items the same day. Do not let the Toss pile sit. Load it for disposal, schedule a junk removal pickup, or arrange donation drop-off before you leave. Items left in limbo have a way of ending up back in the unit.
Repack strategically if keeping the unit. Place heavier boxes on the bottom, lighter on top. Leave a walking aisle down the center. Keep items off concrete floors by using pallets or plastic shelving, and place moisture absorbers throughout.
Pro Tip: Use the one-touch rule during sorting. Once you pick up an item, make a decision and put it in the right pile before touching anything else. Putting something down in a “decide later” spot almost always means it gets sorted twice and slows the whole process down.
The execution phase is where most of the physical and emotional energy goes. Build in a short break every 90 minutes. Decision fatigue is real, and it leads to rushed choices you will regret when you are looking for something six months from now.

Verification and long-term maintenance
Finishing the physical cleanout is not the last step. A proper storage unit cleanout checklist includes follow-up that prevents the unit from deteriorating right after your hard work.
Inspect before you leave or repack
Walk the empty unit one more time after cleaning. Look at the corners, check the door seal, and test the lock. If moisture got in before, it will get in again unless you know the source. Drying, pallets, and desiccants are your front line against mold returning after repacking.
Schedule regular check-ins
Monthly inspections with sweeping and dusting help identify problems early and maintain the unit’s condition over time. Set a recurring calendar reminder. A 20-minute monthly visit is far cheaper and less stressful than discovering water damage six months in.
A smart maintenance schedule looks like this: light sweeping and visual check monthly, deeper dusting and moisture check quarterly, and a full cleanout review annually. Monthly light cleaning with quarterly deep checks is what the pros recommend for staying ahead of problems.
Self cleanout vs. professional help
Factor | DIY cleanout | Professional cleanout |
Cost | Lower upfront, but time-intensive | Higher upfront, significant time savings |
Physical labor | Entirely on you and your team | Handled by trained crew |
Disposal logistics | You arrange pickup or transport | Included in service |
Mold or damage issues | May require specialist knowledge | Experienced crews recognize and flag problems |
Speed | Depends on your schedule | Same-day or scheduled completion |
Pro Tip: If you have not been inside the unit in over a year, assume the cleanout will take twice as long as you think and budget for at least one junk removal run. Surprise volume is the number one reason DIY cleanouts stretch into multi-day projects.
Common mistakes that derail cleanouts
Even with a plan, certain patterns will slow you down or leave the job half done. Watch for these:
Sorting without committing. The “maybe” pile is a trap. It grows throughout the day and turns into a second full sort session. Use the Four-Box Method strictly and make final calls the first time.
Skipping moisture prevention. Cleaning a unit without placing moisture absorbers before repacking is common. Mold prevention requires drying and desiccants even after a thorough clean. Do not skip this step.
Leaving disposal for later. Items that are “going to donation next week” tend to return to the unit. Schedule and execute all disposal on cleanout day.
Trying to do it alone. Cleaning out storage facilities of any real size is a two-person job minimum. Attempting it solo means slower progress, more fatigue, and less careful decisions.
Emotional attachment stalling progress. This is common in personal storage cleanouts. Set a time limit on sentimentality. If you cannot decide on a meaningful item in two minutes, box it for home and make the decision later where you are not on a clock.
When the volume feels unmanageable or you are dealing with a business unit, getting a professional team involved is not a sign of defeat. It is a smart call that saves time and produces better results.
My take on why most cleanouts go sideways
I have seen dozens of storage cleanouts, and the pattern is almost always the same. Someone shows up with good intentions and no written plan, starts sorting from the front of the unit, and burns out by hour two. The items at the back never get touched. Two months later, they are paying storage fees on a half-finished job.
What I have found is that the workflow matters more than the motivation. You can be the most determined person in the room, but without a clear sequence, you will waste energy and end up with a unit that is “organized” in a way that falls apart within weeks.
The moisture piece is something I can not emphasize enough. I have seen beautiful cleanouts ruined six months later because nobody placed a single moisture absorber. Massachusetts humidity is not forgiving. One cycle of condensation and you have mold on items that survived decades in storage.
The unexpected benefit I keep seeing is what happens to people after a real cleanout. There is something about clearing out a physical space that genuinely changes how people feel about other cluttered areas in their lives. It is not dramatic, but it is consistent. People who get through a solid storage unit decluttering process almost always describe feeling lighter. That is worth something.
If this feels like too much to manage on your own, that is a legitimate feeling, not a weakness. Get help and get it done right.
— Joe
Let Junkdispatch handle the heavy lifting
When the cleanout is bigger than one weekend, or you simply do not have time to deal with it all, Junkdispatch is the call to make. We are a Massachusetts-based junk removal team that handles storage unit cleanouts for both homeowners and businesses. We show up, load everything marked for removal, and handle disposal so you do not have to make a dozen trips to the dump.

Whether you need junk removal in Essex County or are looking for a reliable Reading, MA junk pickup service, Junkdispatch offers same-day availability, upfront pricing, and insured crews who know exactly how storage cleanouts work. Book online in minutes and spend your weekend on something else.
FAQ
What is a storage unit cleanout workflow?
A storage unit cleanout workflow is a structured sequence of steps, from inventory and preparation through sorting, cleaning, and verification, that keeps the process organized and efficient from start to finish.
How long does a storage unit cleanout take?
A standard 10x10 unit with moderate contents typically takes four to six hours with two people. Larger or heavily packed units can take a full day or more depending on volume and condition.
What is the best way to sort items during a storage cleanout?
The Four-Box Method works best. Sort every item into one of four categories: keep, store, sell/donate, or toss. Making a decision on each item immediately prevents second-guessing and slows the process down.
How do I prevent mold from coming back after a cleanout?
After cleaning and drying the unit, place moisture absorbers like silica gel or DampRid inside, elevate boxes off concrete floors using pallets or plastic shelving, and schedule monthly check-ins to catch problems early.
When should I hire a professional for a storage unit cleanout?
If the unit has not been accessed in over a year, contains heavy furniture or appliances, or you simply lack the time and crew to complete it in one session, hiring a professional junk removal service saves both time and physical effort.
Recommended
Comments